1. General Account Information
Merchant employees can browse transactions and download various reports via Payneteasy UI. It is available at production environment and at sandbox environment.
1.1. First Login
Upon initial access to Payneteasy UI, after logging in, the Merchant employee will be asked to create and enter a new password.
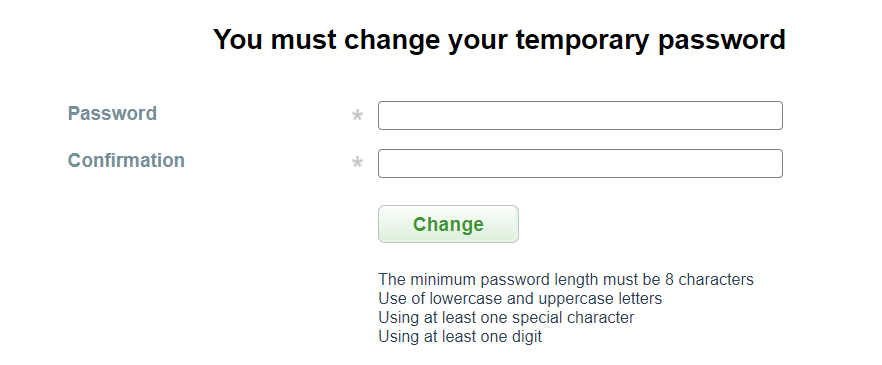
The minimum password length must be 8 characters. The password must contain at least one digit, one lowercase and uppercase letters and at least one special character.
Warning
It is very important that the password does not consist of meaningful linguistic structures. For security reasons it is strongly recommended to use random alphanumeric values and regularly change the password.
1.2. Login With OTP
IF OTP (One Time Password) is enabled, an email will be sent to all users with a one-time link to create a second authentication factor.
An example of this letter:

Inside there is a link, by clicking on which the QR code and the secret key will be available:
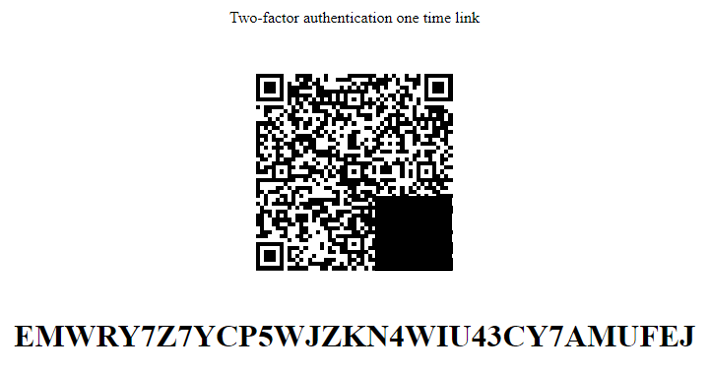
To calculate the second factor, scan the QR code or enter the secret key in any available application that supports HOTP (Google Authenticator, Protectimus Smart OTP, Free OTP Authenticator and others):
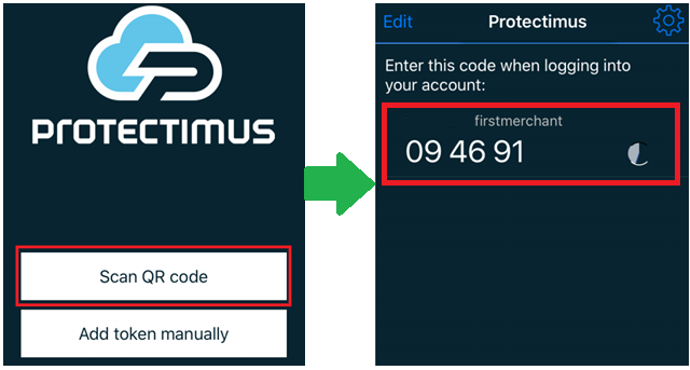
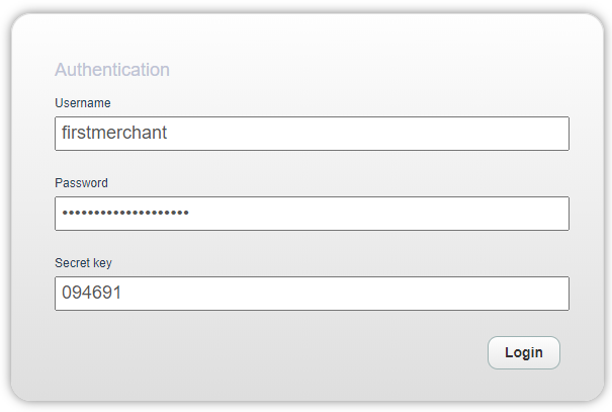
If one-time password authentication is enabled for login, enter this password when logging in. Detailed information on working with OTP is available on the link. When logging into the system, specify a username, password and generated code from the application (each time logging in, new password from application will be required):
1.3. Left Menu

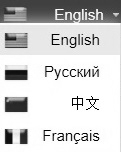
To change language from header menu use the drop-down menu:
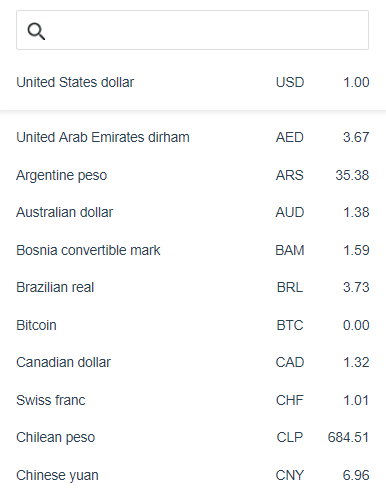
To change the currency for calculations in transaction monitor and dashboard, use the drop-down menu from left menu. Exchange rate is updated daily.
1.4. User Profile
By clicking on Merchant name on the top left side of left menu you will be redirected to user profile with two profile configuration tabs on the right side of the page: “Common” and “Orders full view settings”:
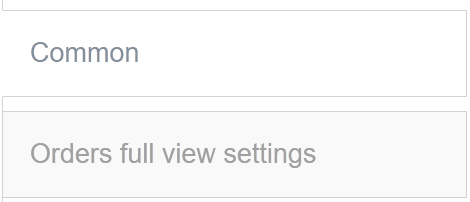
Common
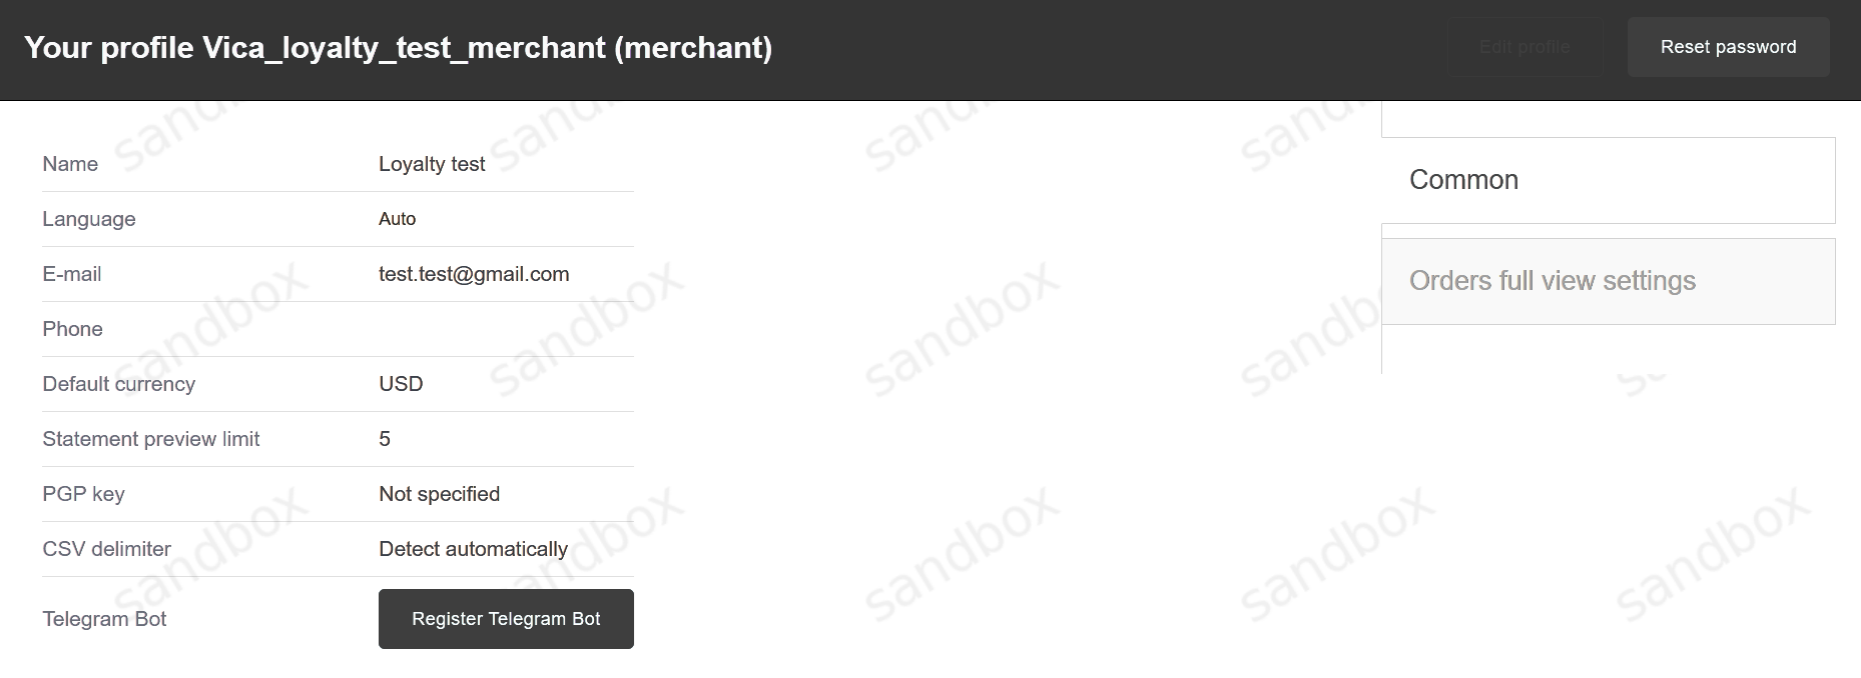
Here you can change:
Name
Language on which system will be automatically displayed in (can be changed from the drop-down list in header menu any time)
E-mail address on which all configured notifications will be sent
Phone
Default currency (can be changed from the drop-down list in header menu any time)
Statement preview limit
PGP key
CSV delimiter - for import/export of reports and batch operations
Telegram Bot - register in bot on which all configured notifications will be sent
Mobile application - link application for notifications
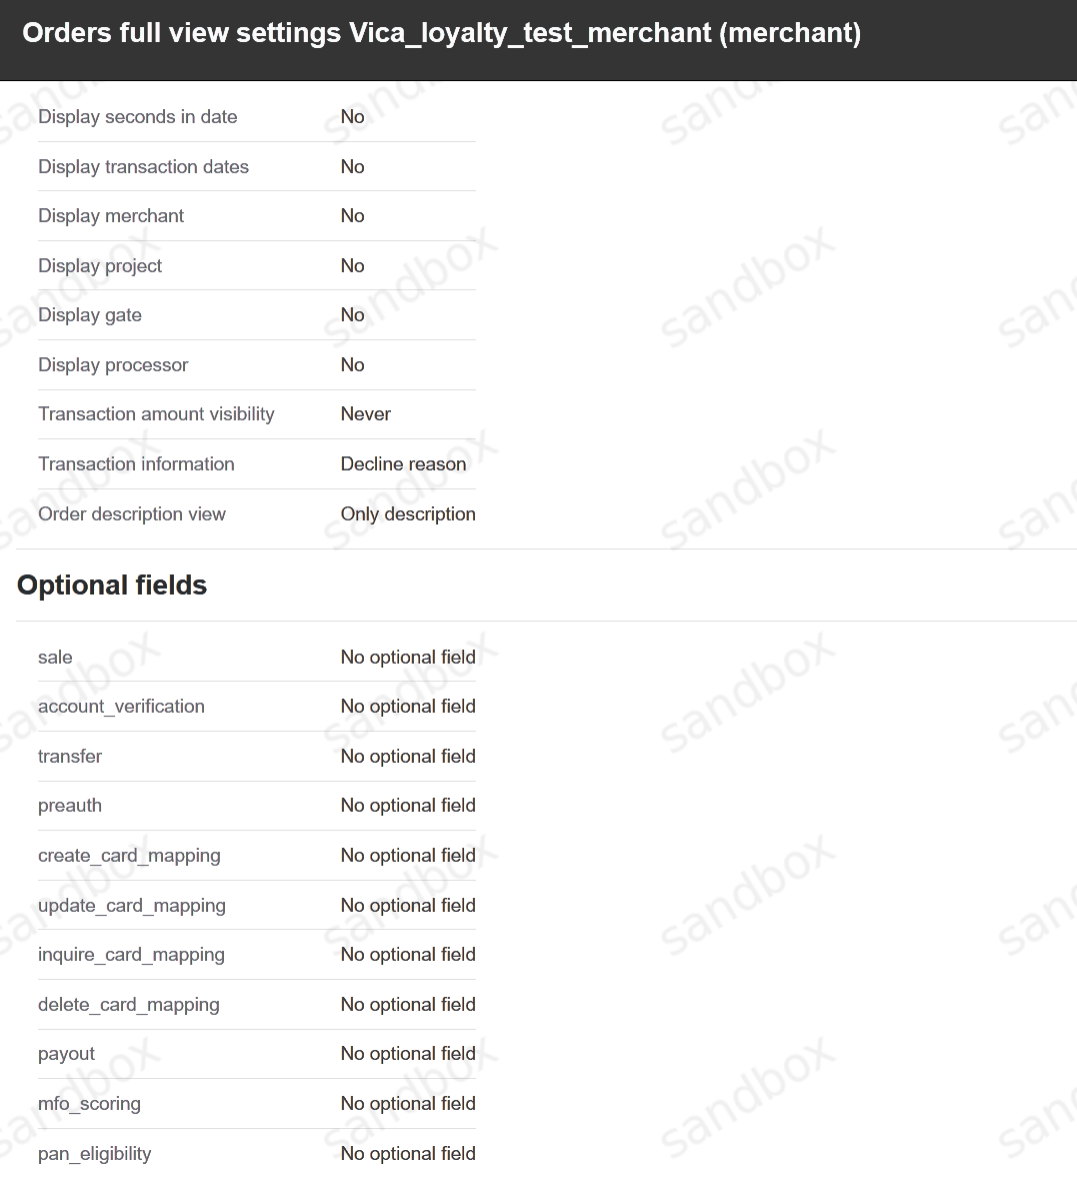
Orders Full View Settings
In this section it is possible to configure visible fields for detailed view on Order search page: