9. Payneteasy MCP Server
9.1. Introduction
A step-by-step guide to connecting the Payneteasy stateless Streamable HTTP MCP server to Claude Desktop, Claude Code and other AI agents, authenticated with a restricted access token.
At a glance
Production endpoint |
|
Authorization |
|
Transport |
Streamable HTTP (stateless) |
Token rights |
|
Note
The server is read-only. A MCP Read Only token cannot mutate platform
state — every exposed tool is annotated readOnlyHint: true.
9.2. MCP server URLs
Pick the endpoint that matches your environment. The configuration examples throughout this guide use the production URL — replace it with the sandbox URL when needed.
Environment |
MCP endpoint |
Purpose |
|---|---|---|
Production |
|
Live payment traffic |
Sandbox |
|
Safe testing and integration |
Warning
The restricted access token is issued per environment. Create the token in the profile of the same environment you intend to connect to — a token from one environment will not work on another.
9.3. Get a restricted access token
Access to the MCP server uses a Bearer token. We use a restricted access
token — it grants rights only to a selected set of operations. The
MCP Read Only profile is enough to connect MCP.
Step 1 — Open your user profile
Go to the Restricted tokens section: Settings → Profile → Restricted tokens.
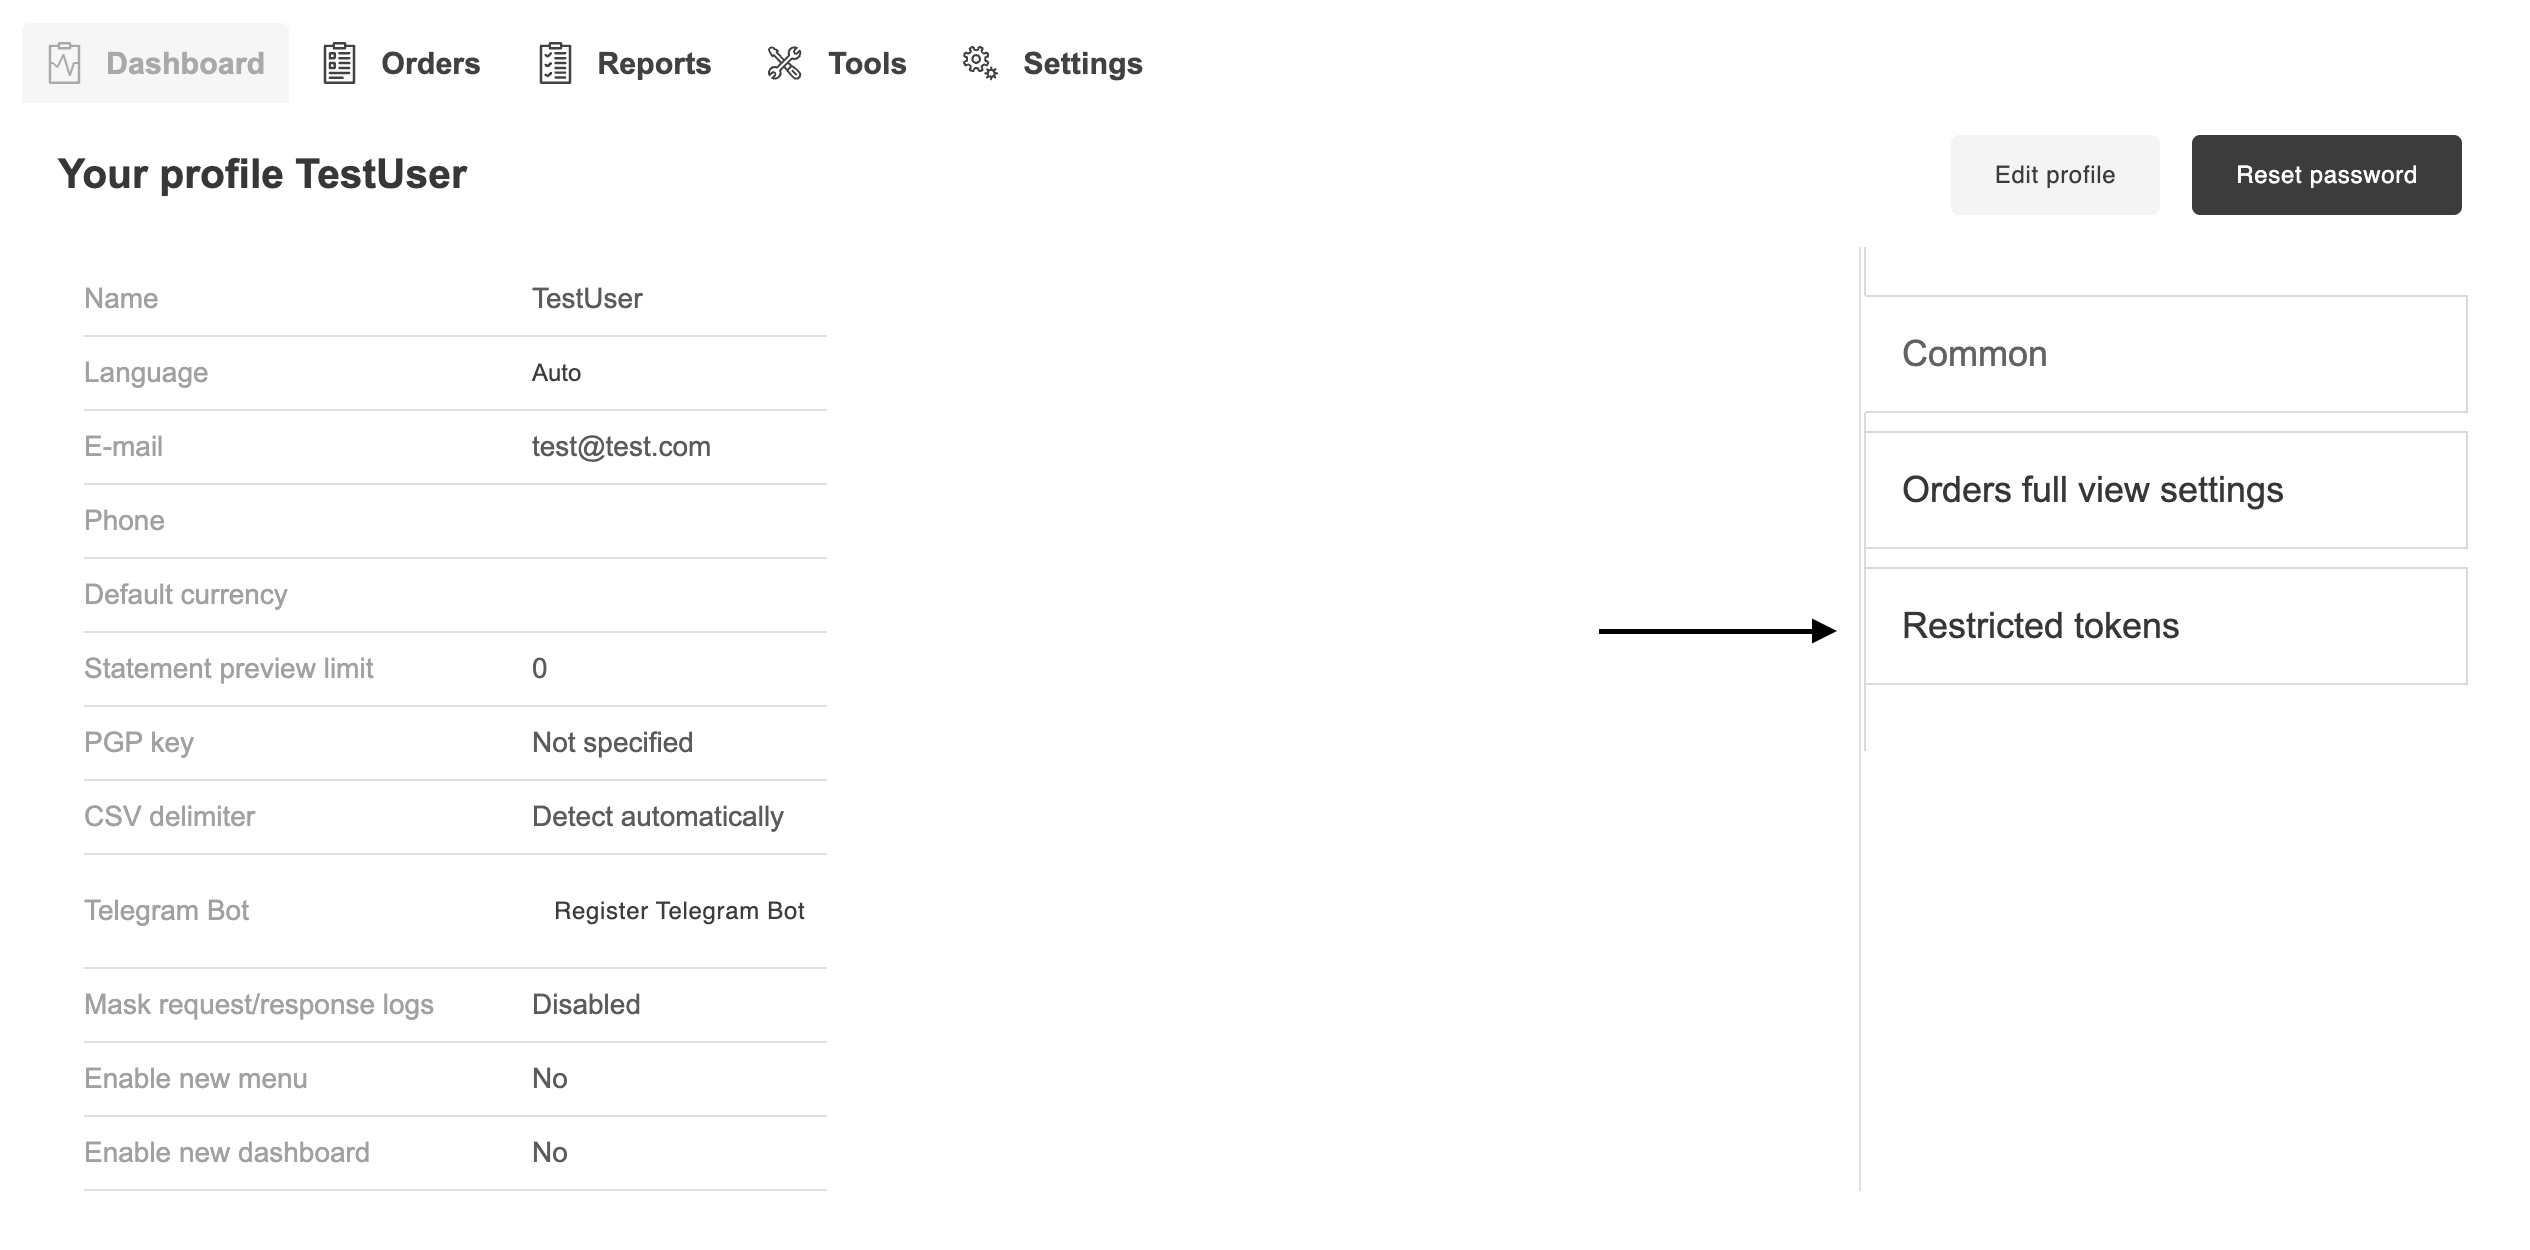
Screen 1. Profile → “Restricted tokens” section.
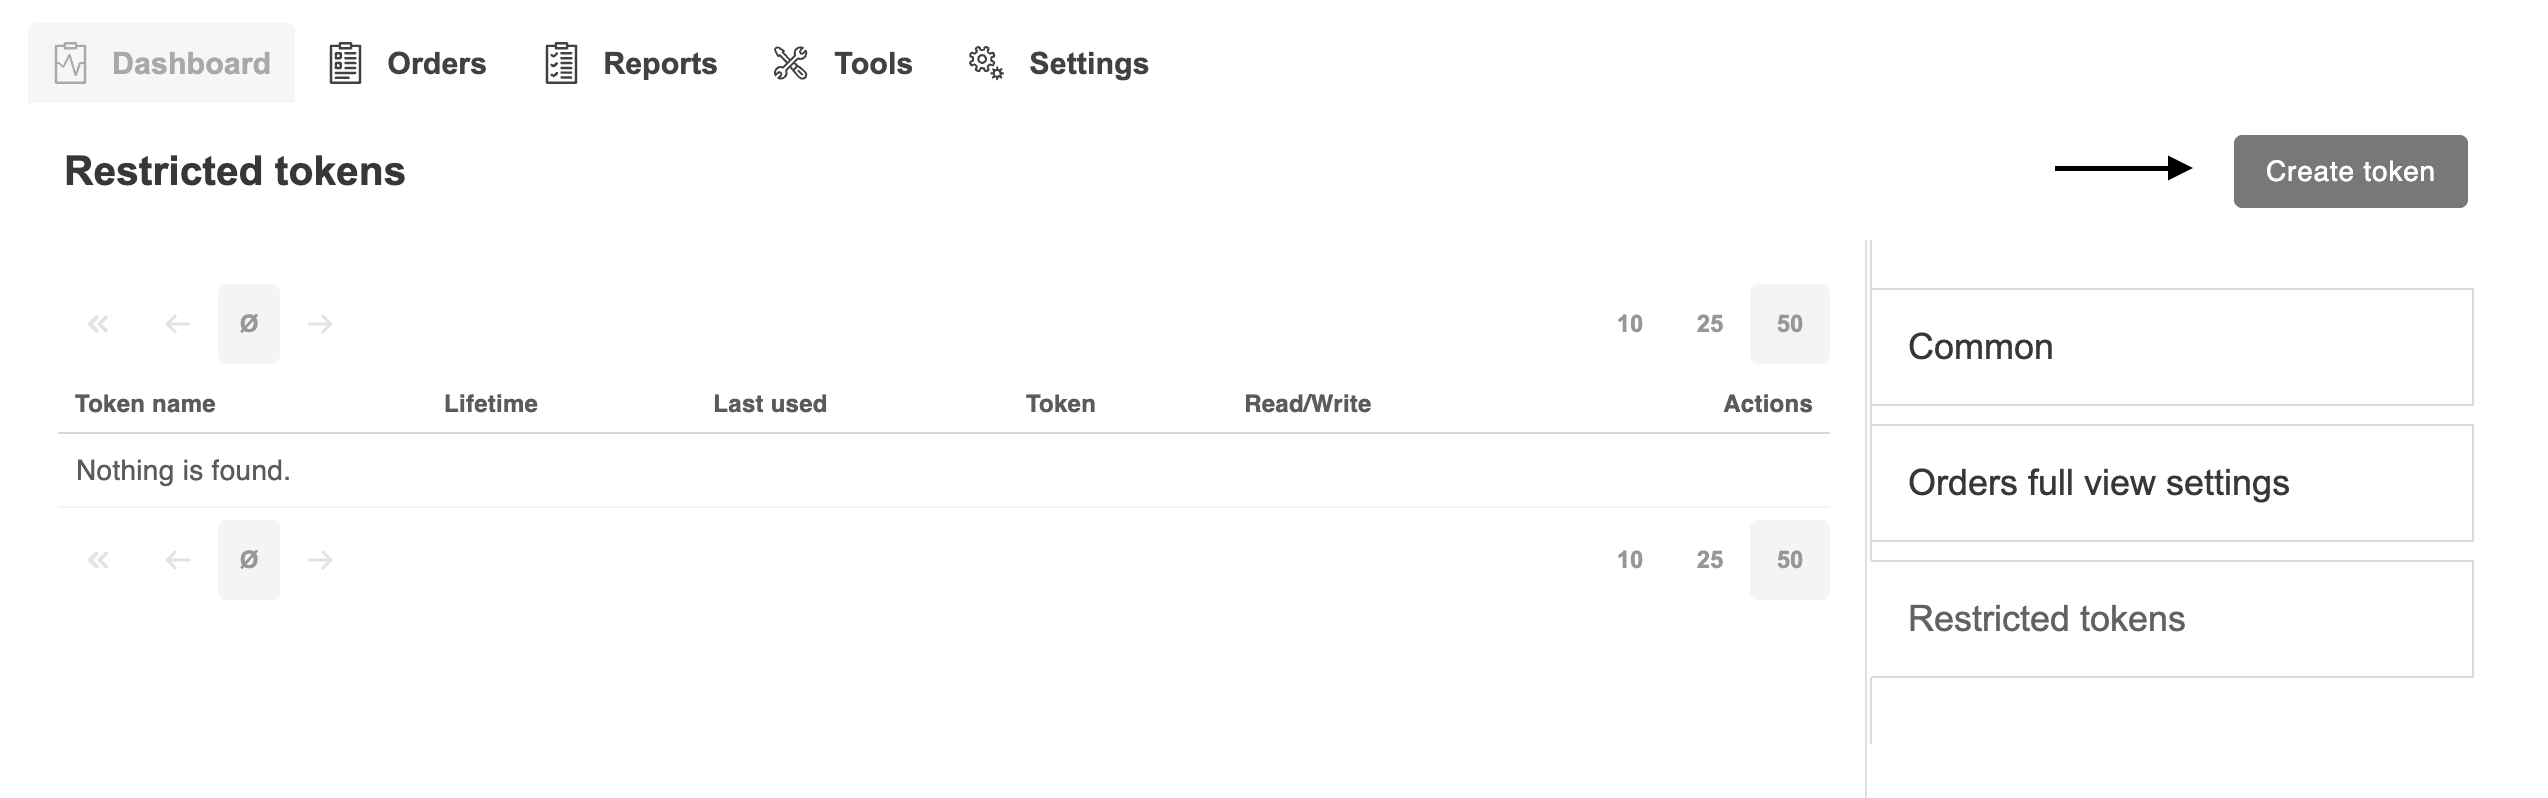
Screen 2. The “Create token” button.
Step 2 — Click “Create token”
The button is in the top-right corner of the Restricted tokens page.
Step 3 — Fill in the token parameters
Field |
Value |
|---|---|
Name |
any name, e.g. |
Lifetime in days |
up to |
Access rights |
tick the |
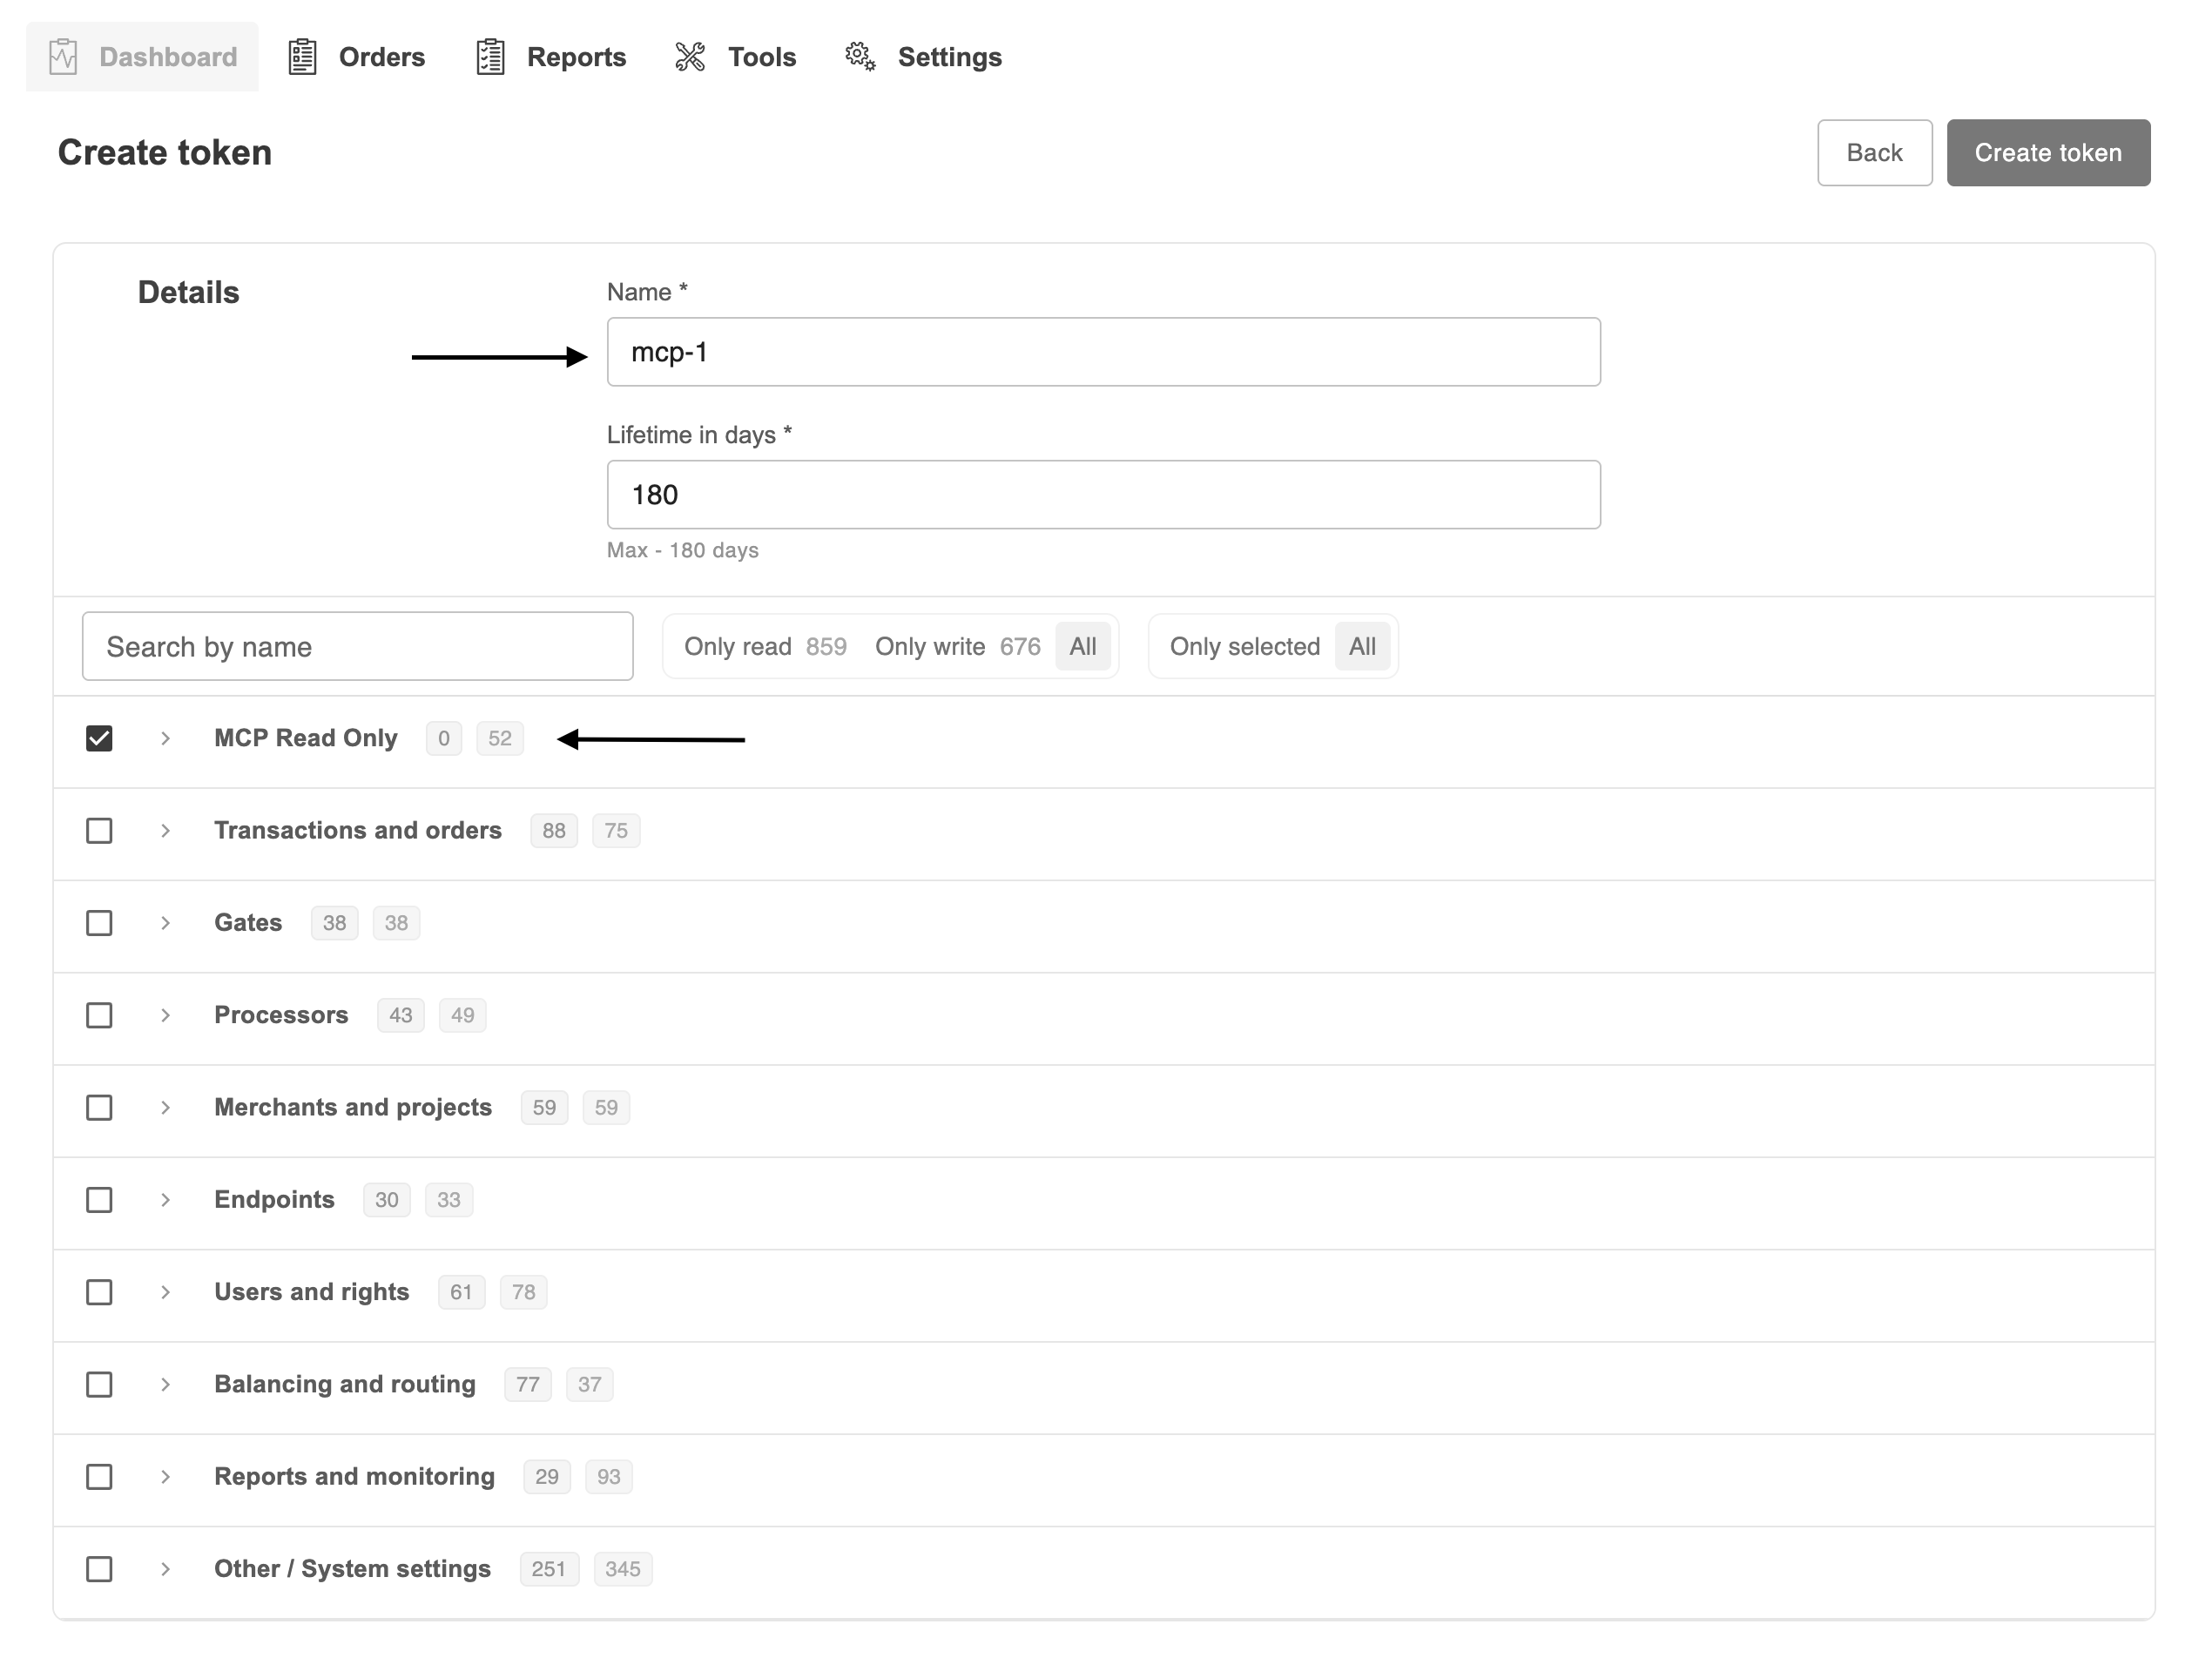
Screen 3. ① token name · ② the “MCP Read Only” checkbox.
Step 4 — Create and copy the token
Click Create token (top-right of the form), then copy the token value.
Danger
The token is shown only once. Immediately click “Copy to clipboard” and
store it safely — you cannot view the value again. It is a long JWT string of
the form eyJ….
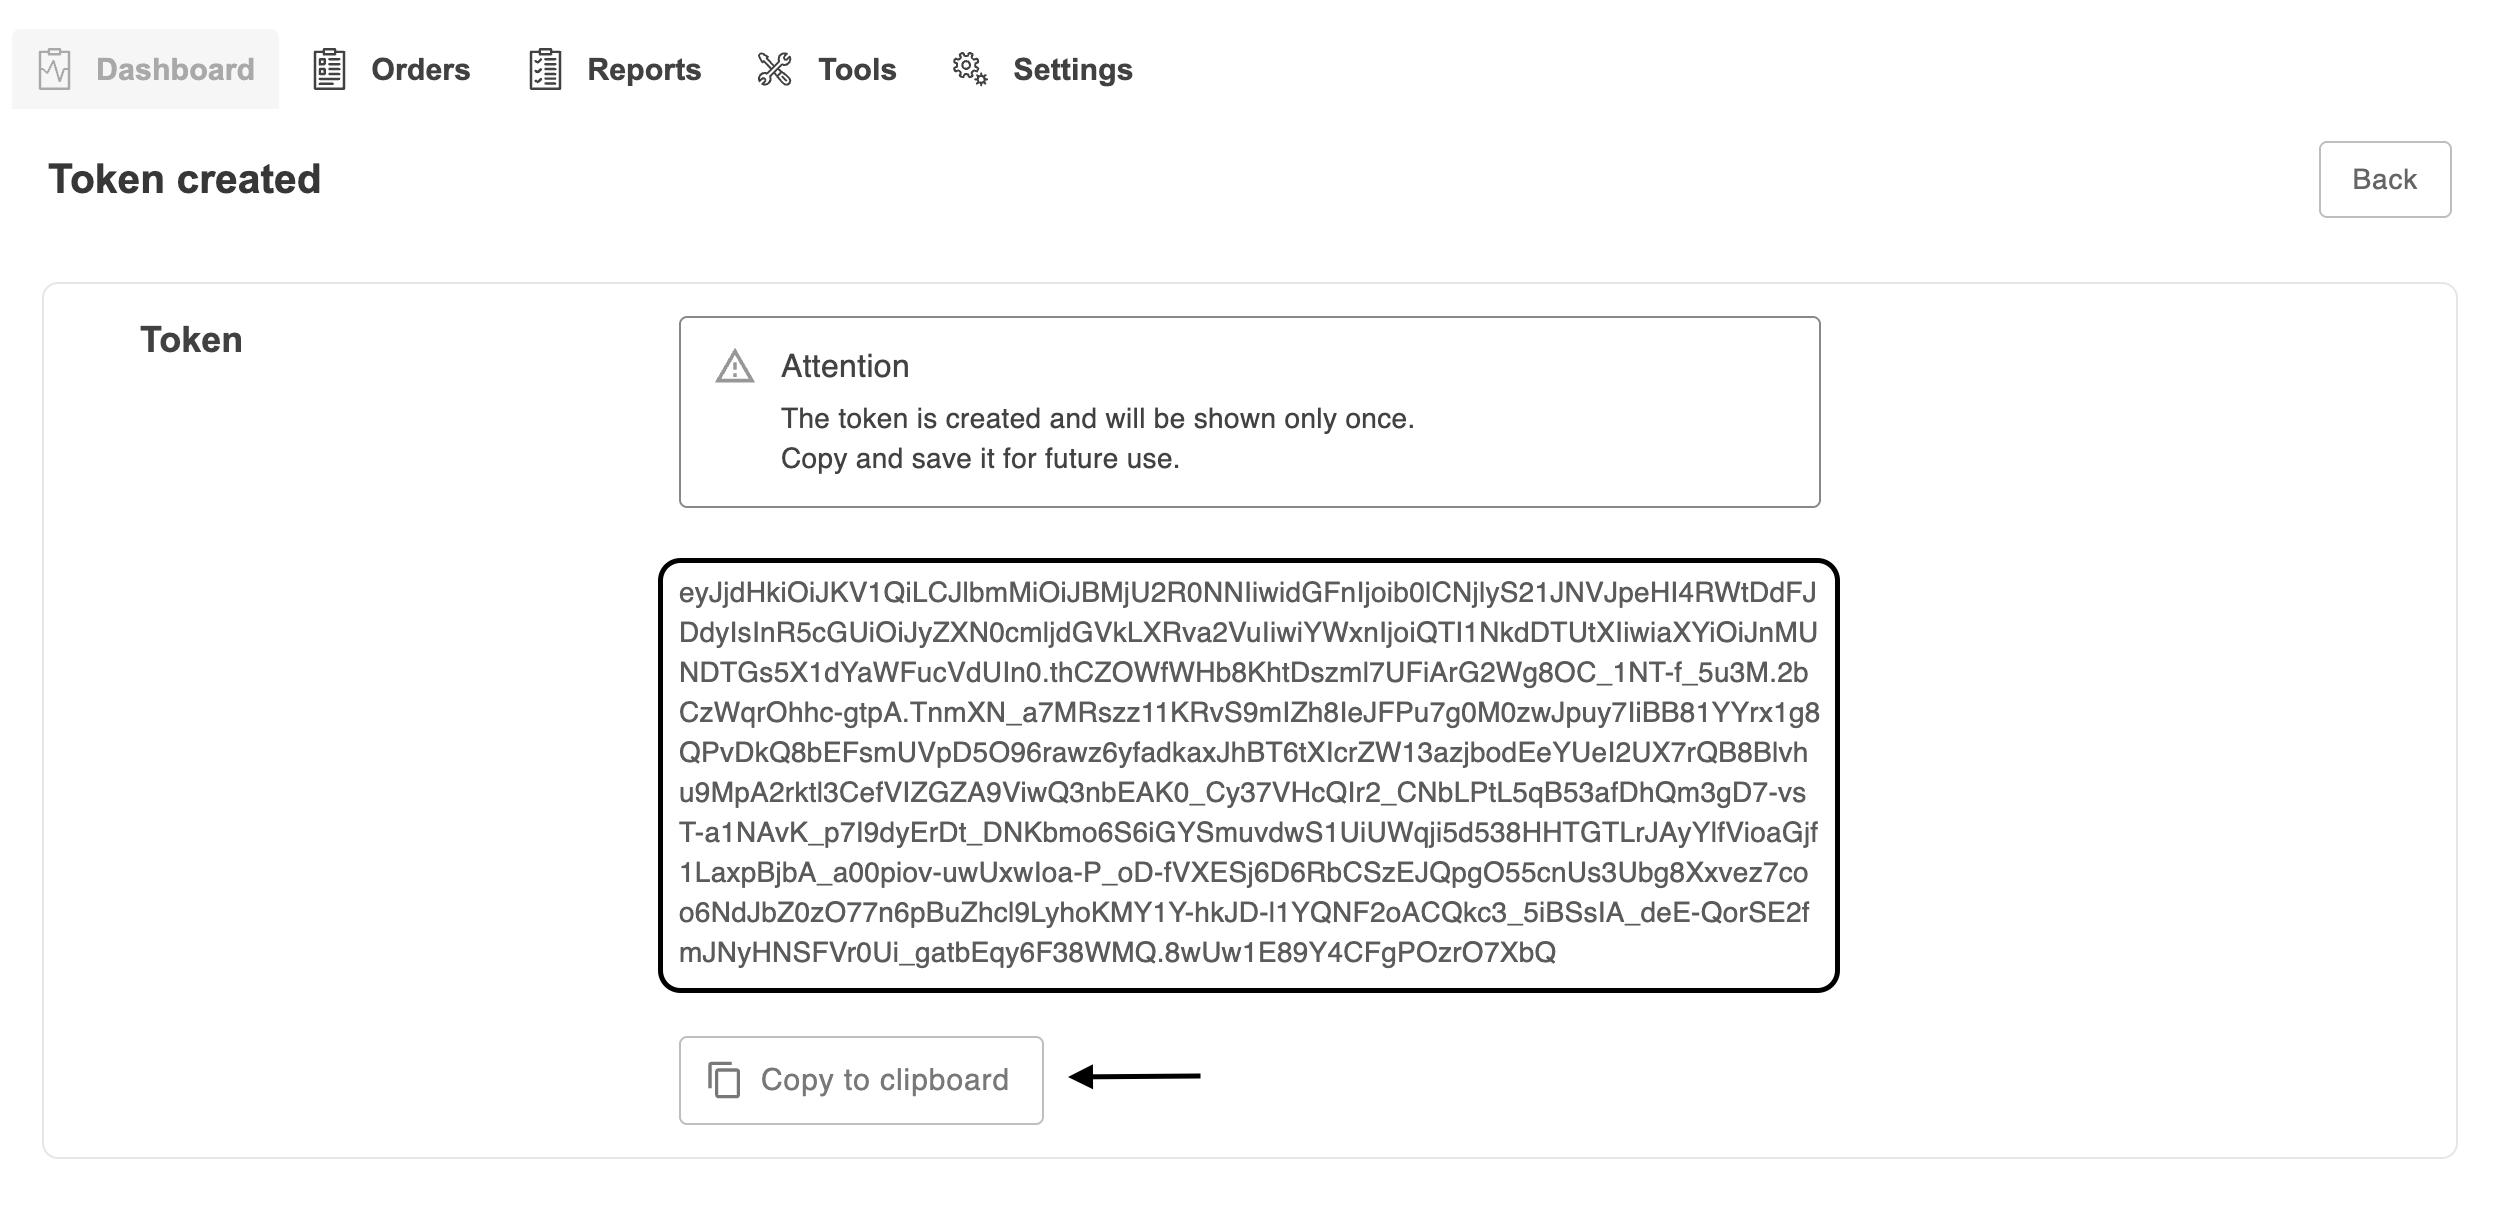
Screen 4. The created token — click “Copy to clipboard” and save it.
Tip
In every configuration below, replace <ACCESS_TOKEN> with the value you
copied. The token is sent to the server in the
Authorization: Bearer <ACCESS_TOKEN> header.
9.4. Claude Desktop
Claude Desktop connects to remote MCP servers through a configuration file. Since
our server uses an HTTP transport, it is added to the mcpServers section.
Where the file is located
OS |
Path |
|---|---|
macOS |
|
Windows |
|
You can also open it from the app: Settings → Developer → Edit Config.
Configuration
{
  "mcpServers": {
    "Payneteasy": {
      "type": "http",
      "url": "https://gate.payneteasy.com/mcp-ui",
      "headers": {
        "Authorization": "Bearer <ACCESS_TOKEN>"
      }
    }
  }
}
Note
After saving the file, fully restart Claude Desktop. The connected server appears in the tools menu (the “🔌 / Search and tools” icon).
Alternative: via mcp-remote
If your version of Claude Desktop does not support a direct HTTP transport, use
the mcp-remote bridge (Node.js required):
{
  "mcpServers": {
    "Payneteasy": {
      "command": "npx",
      "args": [
        "-y",
        "mcp-remote",
        "https://gate.payneteasy.com/mcp-ui",
        "--header",
        "Authorization: Bearer <ACCESS_TOKEN>"
      ]
    }
  }
}
Windows: fixing the startup issue
On Windows, launching npx by an absolute path often breaks because of the
space in C:\Program Files\nodejs. The fix is to run it through cmd /c npx
with a bare npx — it is picked up from PATH, so the space no longer breaks
argument parsing:
{
  "mcpServers": {
    "Payneteasy": {
      "command": "cmd",
      "args": [
        "/c",
        "npx",
        "-y",
        "mcp-remote",
        "https://gate.payneteasy.com/mcp-ui",
        "--header",
        "Authorization: Bearer <ACCESS_TOKEN>"
      ]
    }
  }
}
That is, command = cmd, and npx becomes the first argument after
/c. The resulting command line is cmd /c npx -y mcp-remote …, and the
space in “Program Files” no longer matters.
Tip
If it still misbehaves, as a fallback specify the 8.3 short path:
"command": "C:\PROGRA~1\nodejs\npx.cmd". But the cmd /c npx variant is
usually enough.
9.5. Claude Code
In Claude Code, MCP servers are added with a single claude mcp add command or
via a .mcp.json file in the project root.
Via the CLI
The fastest way is to add an HTTP server with an authorization header:
# transport http, server name Payneteasy
claude mcp add --transport http Payneteasy \
  https://gate.payneteasy.com/mcp-ui \
  --header "Authorization: Bearer <ACCESS_TOKEN>"
Visibility is set with the --scope flag:
Scope |
Description |
|---|---|
|
only for you in the current project (default) |
|
in |
|
available across all your projects |
Checking the connection
claude mcp list           # list servers and their status
claude mcp get Payneteasy # server details
Inside a Claude Code session, the status is checked with the /mcp command.
Via the project file
To make the server available to the whole team, add a .mcp.json to the
repository root. It’s best not to commit the token — move it to an environment
variable:
{
  "mcpServers": {
    "Payneteasy": {
      "type": "http",
      "url": "https://gate.payneteasy.com/mcp-ui",
      "headers": {
        "Authorization": "Bearer ${PAYNET_MCP_TOKEN}"
      }
    }
  }
}
export PAYNET_MCP_TOKEN="<ACCESS_TOKEN>"
Note
Claude Code expands ${VAR} from the environment at startup. Commit
.mcp.json to the repository, and keep the token itself in a local .env
/ secret manager.
9.6. Other AI agents
The principle is the same for every client: point to the endpoint
https://gate.payneteasy.com/mcp-ui, use the Streamable HTTP transport, and
the Authorization: Bearer <ACCESS_TOKEN> header. Below are concrete
configurations for popular agents.
Cursor
File: ~/.cursor/mcp.json or .cursor/mcp.json in the project.
{
  "mcpServers": {
    "Payneteasy": {
      "url": "https://gate.payneteasy.com/mcp-ui",
      "headers": {
        "Authorization": "Bearer <ACCESS_TOKEN>"
      }
    }
  }
}
Then: Settings → MCP → Enable for the Payneteasy server.
VS Code (GitHub Copilot / Agent Mode)
File: .vscode/mcp.json.
{
  "servers": {
    "Payneteasy": {
      "type": "http",
      "url": "https://gate.payneteasy.com/mcp-ui",
      "headers": {
        "Authorization": "Bearer <ACCESS_TOKEN>"
      }
    }
  }
}
Start the server via the Start button above the block in mcp.json or with
the MCP: List Servers command.
Cline · Windsurf · other MCP clients
Most clients use a single format. If a client only supports stdio, wrap the HTTP
server with mcp-remote:
{
  "mcpServers": {
    "Payneteasy": {
      "command": "npx",
      "args": [
        "-y", "mcp-remote",
        "https://gate.payneteasy.com/mcp-ui",
        "--header",
        "Authorization: Bearer <ACCESS_TOKEN>"
      ]
    }
  }
}
Manual check (curl)
Before configuring an agent, you can verify that the token works:
curl https://gate.payneteasy.com/mcp-ui \
  -H "Authorization: Bearer <ACCESS_TOKEN>" \
  -H "Content-Type: application/json" \
  -H "Accept: application/json, text/event-stream" \
  -d '{"jsonrpc":"2.0","id":1,"method":"tools/list"}'
The response should contain the list of available tools — that means the server and token are configured correctly.
Parameter summary for any agent
URL —
https://gate.payneteasy.com/mcp-uiTransport — Streamable HTTP (stateless)
Header —
Authorization: Bearer <ACCESS_TOKEN>Token rights —
MCP Read Only
9.7. Domain model
The server ships a domain model in its instructions field so an agent knows
how the entities relate before it calls any tool. The model is reproduced here.
Orders and transactions
An order is a customer purchase attempt. It contains one or more transactions: pre-authorization, capture, refund, chargeback.
Transaction statuses are approved, declined and filtered (filtered = blocked by fraud-prevention rules before processing).
Statistics tools
The stats_* tools return aggregates (counts and amounts) — never
individual orders. Use orders_search to find specific orders.
stats_get_transaction_timeseriesreturns count + amount per time bucket (day / week / month), split by transaction status.stats_get_transaction_summaryreturns sales / reversals / chargebacks / frauds / disputes (counts + amounts + ratios) for a date range, broken down by card type, with a grand total.stats_list_top_entitiesranks merchants / companies / processors by a metric over a date range (highest first); reuse the returned ids in the*_get_detailstools or as stats filters.stats_get_breakdownsplits a metric over a date range (bar chart) by transaction status, card-issuer / IP country, or decline / chargeback / fraud reason. Same filters as the timeseries tool.
Order tools
orders_get_detailsreturns one order by id: the order/transaction summary, the customer’s card metadata + masked contact, and the merchant routing. Sections appear only for the order APIs the token may call.orders_searchfinds orders by a change-date window with optional status / entity filters and paging; returns safe order summaries. Useorders_get_detailsfor one order’s full detail.orders_get_logsreturns an order’s processing session stages (the log trail), each stage with its message;mode=UNLIMITEDfor the full set.
Resolving ids
Resolve currency / card-type ids via refs_list_*, and
merchant / processor / manager / etc. ids via the *_search tools, before using
them as stats filters.